|
|
|
PDF ED-X10 Data sheet ( Hoja de datos )
| Número de pieza | ED-X10 | |
| Descripción | (ED-X10 / ED-X12) SERVICE MANUAL | |
| Fabricantes | Hitachi | |
| Logotipo | ||
Hay una vista previa y un enlace de descarga de ED-X10 (archivo pdf) en la parte inferior de esta página. Total 30 Páginas | ||
|
No Preview Available !
SERVICE MANUAL
YK No.0567E
ED-X10/ED-X12
(CC9XM2)
Warning
The technical information and parts shown in this
manual are not to be used for: the development,
design, production, storage or use of nuclear, chemical,
biological or missile weapons or other weapons of
mass destruction; or military purposes; or purposes that
endanger global safety and peace. Moreover, do not
sell, give, or export these items, or grant permission for
use to parties with such objectives. Forward all inquiries
to Hitachi Ltd.
Caution
Be sure to read this manual before servicing. To assure safety from fire, electric shock, injury, harmful
radiation and materials, various measures are provided in this Hitachi Multimedia LCD Projector. Be
sure to read cautionary items described in the manual to maintain safety before servicing.
Service Warning
http://www.DataSheet4U.net/
1. When replace the lamp, to avoid burns to your fingers. The lamp becomes too hot.
2. Never touch the lamp bulb with a finger or anything else. Never drop it or give it a shock. They may
cause bursting of the bulb.
3. This projector is provided with a high voltage circuit for the lamp. Do not touch the electric parts of
power unit (circuit) and power unit (ballast), after turn on the projector.
4. Do not touch the exhaust fan, during operation.
5. The LCD module assembly is likely to be damaged. If replacing to the LCD LENS/PRISM assembly,
do not hold the FPC of the LCD module assembly.
6. Use the cables which are included with the projector or specified.
Contents
1. Features ------------------------------------------------------ 2
2. Specifications ----------------------------------------------- 2
3. Names of each part---------------------------------------- 3
4. Adjustment--------------------------------------------------- 6
5. Troubleshooting ------------------------------------------ 12
6. Service points --------------------------------------------- 17
7. Wiring diagram-------------------------------------------- 31
8. Disassembly diagram ----------------------------------- 40
9. Replacement parts list ---------------------------------- 47
10.RS-232C communication------------------------------- 49
11. Block diagram--------------------------------------------- 59
12.Connector connection diagram ----------------------- 60
13.Basic circuit diagram ------------------------------------ 61
SPECIFICATIONS AND PARTS ARE SUBJECT TO CHANGE FOR IMPROVEMENT.
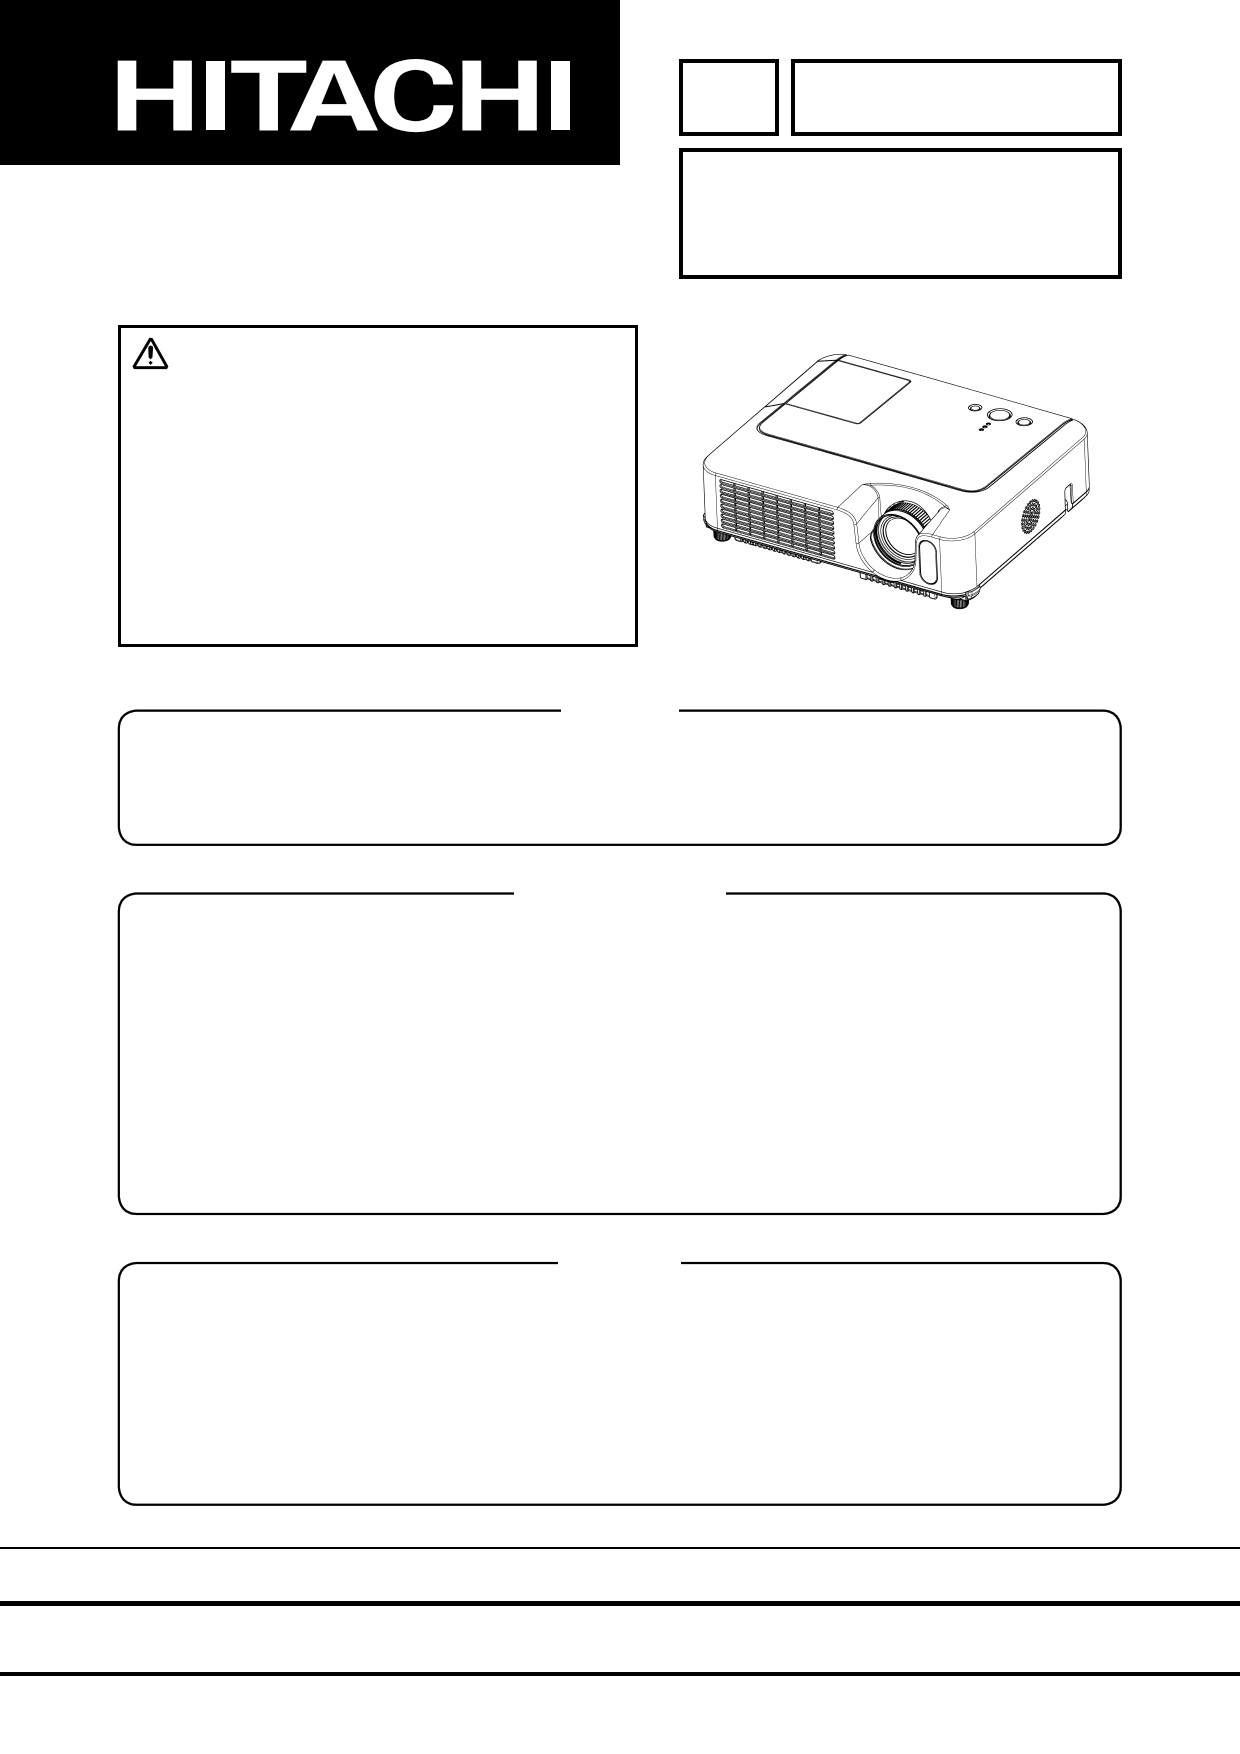
Multimedia LCD Projector
April 2006
datasheet pdf - http://www.DataSheet4U.net/
1 page 
ED-X10/ED-X12(CC9XM2)
Control buttons
Cursor buttons
▲,▼,◄,►
STANDBY/ON button
LAMP indicator
TEMP indicator
POWER indicator
INPUT button
Remote control
SEARCH button
RGB button
VIDEO button
ASPECT button
HOME button
MAGNIFY
ON button
OFF button
END button
FREEZE button
POSITION button
ESC button
Battery cover
(on the back)
VIDEO
RGB
SEARCH
http://www.DataSheet4U.net/
ASPECT
AUTO BLANK
MAGNIFY
ON
HOME
PAGE UP VOLUME
END PAGE DOWN MUTE
OFF
FREEZE
MY BUTTON KEYSTONE
12
POSITION
MENU
ESC
ENTER
RESET
STANDBY/ON button
AUTO button
BLANK button
PAGE UP button
VOLUME button
MUTE button
PAGE DOWN button
KEYSTONE button
MY BUTTON button
MENU button
Cursor buttons
▲,▼,◄,►
ENTER button
RESET button
5
datasheet pdf - http://www.DataSheet4U.net/
5 Page 
ED-X10/ED-X12(CC9XM2)
Adjustment procedure 2
(visual inspection)
1. First adjust [MIN] tone [G:].
2. Select [No.2] [G:].
If the background is [G] monochrome, press the
[ENTER] key on the remote control to switch to
solid white.
3. View measurement point [No.2] and [No.3].
Lower the [G] color intensity only of the color
point whose [G] color is more intense than
measurement point [No.1].
4. View measurement point [No.10] and [No.11].
Lower the [G] color intensity only of the color
point whose [G] color is more intense than
measurement point [No.1], and raise the inten-
sity of the point whose color intensity is lower
than measurement point [No.1].
5. Now adjust the [MIN] tone for colors [R] and
[B].
6. View measurement points [No.2], [No.3],
[No.10] and [No.11]. Adjust the [R] and [B] of
each measurement point so that they have the
same color as measurement point [No.1].
Adjustment technique:
First, adjust [B:] of the point whose color is to
be adjusted so that it approximates that of
[No.1]. If [R:] is low at this time, the image will
have cyan cast, in which case [R:] is increased.
On the other hand, if [R:] is excessive, the im-
age will have a magenta cast, in which case
[R:] is decreased.
Overall, a cyan cast makes it easy to see color
shading.
7. Next, view measurement points [No.4], [No.5],
[No.12], [No.13] and make similar adjustments.
8. Then adjust measurement points [No.6], [No.7],
[No.8], [No.9], [No.14], [No.15], [No.16] and [No.17].
This completes the [MIN] tone adjustments.
9. Make similar adjustments for other tones, ex-
cept the [MID-4] and [MID-6] tones, as de-
scribed in steps 1 to 8 above.
No. 2 deviation range
14 12 16
64 8
10 2 1 3 11
7
15
5
13
9
17
No. 4 deviation range
14 12 16
64 8
10 2 1 3 11
7
15
5
13
9
17
No. 6 deviation range
14 12 16
64 8
10 2 1 3 11
7
15
5
13
9
17
No. 14 deviation range
14 12 16
64 8
10 2 1 3 11
7
15
5
13
9
17
No. 10 deviation range
14 12 16
64 8
10 2 1 3 11
7
15
5
13
9
17
No. 12 deviation range
14 12 16
64 8
10 2 1 3 11
7
15
5
13
9
17
No. 7 deviation range
14 12 16
64 8
10 2 1 3 11
7
15
5
13
9
17
No. 15 deviation range
14 12 16
64 8
10 2 1 3 11
7
15
5
13
9
17
No. 3 deviation range
14http://www.DataSheet4U.net/
12
16
64 8
10 2 1 3 11
7
15
5
13
9
17
No. 5 deviation range
14 12 16
64 8
10 2 1 3 11
7
15
5
13
9
17
No. 8 deviation range
14 12 16
64 8
10 2 1 3 11
7
15
5
13
9
17
No. 16 deviation range
14 12 16
64 8
10 2 1 3 11
7
15
5
13
9
17
No. 11 deviation range
14 12 16
64 8
10 2 1 3 11
7
15
5
13
9
17
No. 13 deviation range
14 12 16
64 8
10 2 1 3 11
7
15
5
13
9
17
No. 9 deviation range
14 12 16
64 8
10 2 1 3 11
759
15 13 17
No. 17 deviation range
14 12 16
64 8
10 2 1 3 11
759
15 13 17
11
datasheet pdf - http://www.DataSheet4U.net/
11 Page | ||
| Páginas | Total 30 Páginas | |
| PDF Descargar | [ Datasheet ED-X10.PDF ] | |
Hoja de datos destacado
| Número de pieza | Descripción | Fabricantes |
| ED-X10 | (ED-X10 / ED-X12) SERVICE MANUAL | Hitachi |
| ED-X10 | (ED-X10 / ED-X12) User MANUAL | Hitachi |
| ED-X12 | (ED-X10 / ED-X12) SERVICE MANUAL | Hitachi |
| ED-X12 | (ED-X10 / ED-X12) User MANUAL | Hitachi |
| Número de pieza | Descripción | Fabricantes |
| SLA6805M | High Voltage 3 phase Motor Driver IC. |
Sanken |
| SDC1742 | 12- and 14-Bit Hybrid Synchro / Resolver-to-Digital Converters. |
Analog Devices |
|
DataSheet.es es una pagina web que funciona como un repositorio de manuales o hoja de datos de muchos de los productos más populares, |
| DataSheet.es | 2020 | Privacy Policy | Contacto | Buscar |